
Boost page performance by using Suspense in Nextjs application
Introduction
How often have you encountered a web application that felt sluggish, prompting a frustrating wait for content to load?
Enter Suspense, the React 16+ feature that lets you render a fallback declaratively while a component is waiting for some asynchronous operation. Now, Next.js 13+ offers a new way to add Suspense to application using the app router, and help developers handle loading states better than before.
In this blog post, we delve into a practical case study: a Next.js 14 page designed to fetch Pokémon data from the PokeAPI. We'll compare the performance of two versions of this page — one leveraging Suspense and the other not.
Understanding Suspense
Using Suspense, you can delay displaying parts of your website until all necessary data is received. During this wait, a fallback UI is shown, preventing users from encountering incomplete content.
This method not only speeds up the initial page load but also significantly improves the overall user experience by ensuring seamless and uninterrupted interactions with your application.
You can pre-render loading indicators such as skeletons and spinners, or a small but meaningful part of future screens such as a cover photo, title, etc; reassuring users that the app is actively processing their request.
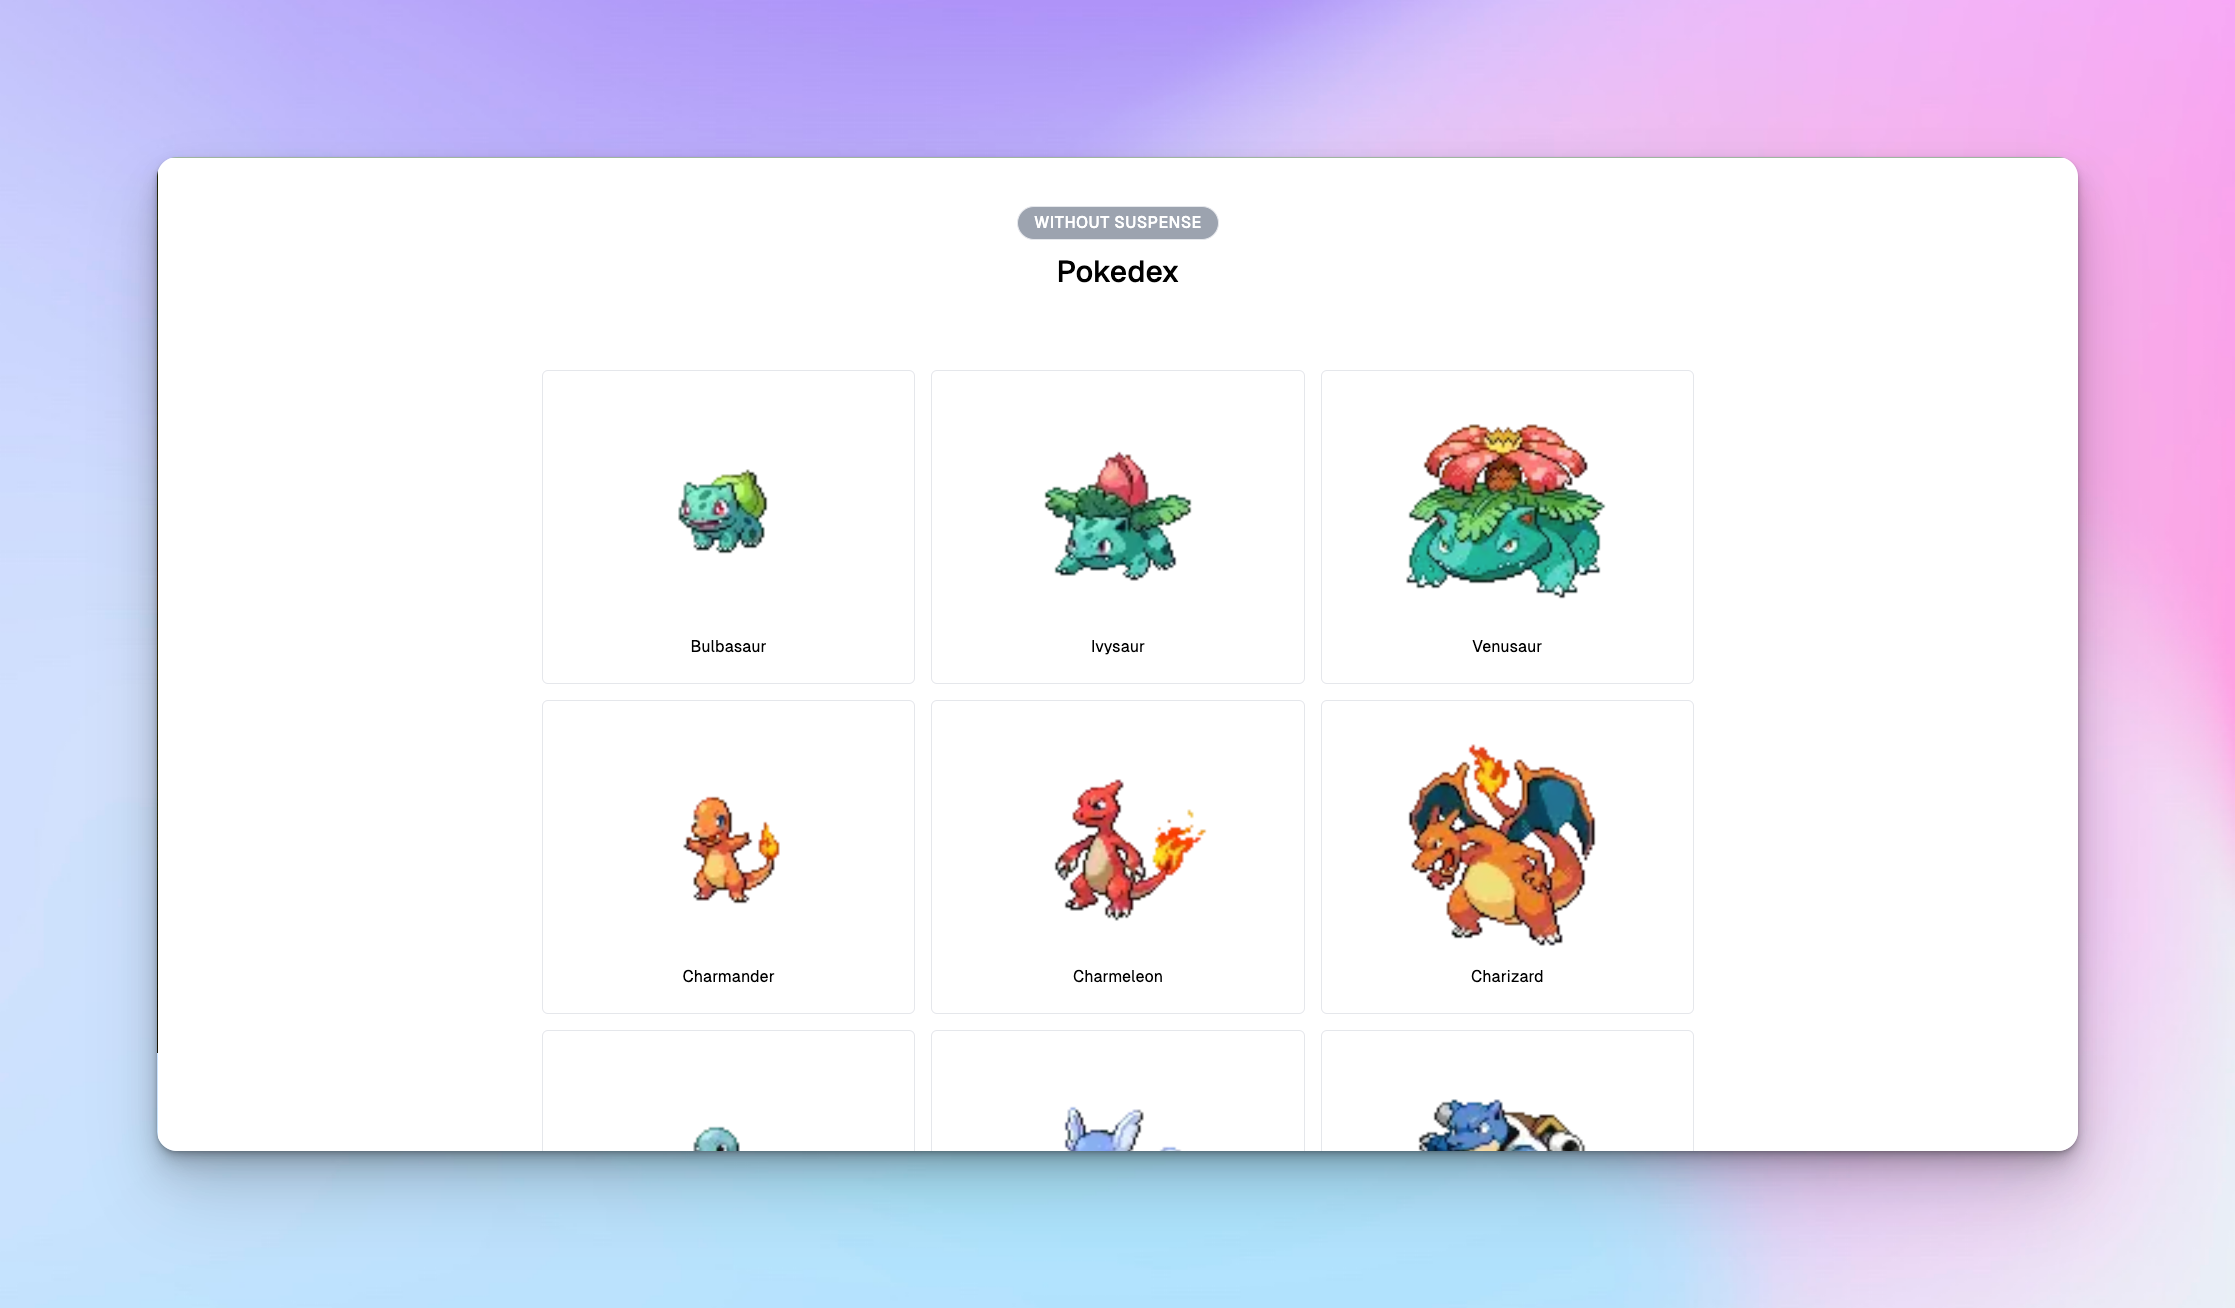
Without Suspense
In this scenario, we fetched 150 pokemons using the pokeapi.co. To simulate the delay of data fetching from the server, we've added a 2-second timeout, in the server action.
"use server";

import { PokemonList, pokemonListSchema } from "./types";

export async function getPokemonsList(): Promise<PokemonList> {
  await new Promise((resolve) => setTimeout(resolve, 2000));
  const response = await fetch(
    "[https://pokeapi.co/api/v2/pokemon-form?limit=150](http://pokeapi.co/)"
  );
  const data = await response.json();
  const parsedData = pokemonListSchema.parse(data);
  return parsedData;
}
and then mapping over the result in the home page.
<div className="grid grid-cols-3 max-w-6xl gap-4 w-full mx-auto">
        {pokemons.results.map((pokemon, index) => (
          <Link
            href={`/pokemon/${pokemon.name}`}
            className="flex flex-col p-6 hover:bg-gray-50 dark:hover:bg-gray-900 items-center border border-gray-200 hover:border-gray-300 dark:border-gray-800 hover:dark:border-gray-700 rounded-md"
            key={index}
          >
            <Image
              src={`/assets/${pokemon.name}.jpg`}
              height={240}
              width={240}
              alt={pokemon.name}
            />
            <p>
              {pokemon.name.charAt(0).toUpperCase() + pokemon.name.slice(1)}
            </p>
          </Link>
        ))}
      </div>
The page waits until all the data has been fetched, delaying the display of any content. Thus, the user must wait even for the initial character to render.
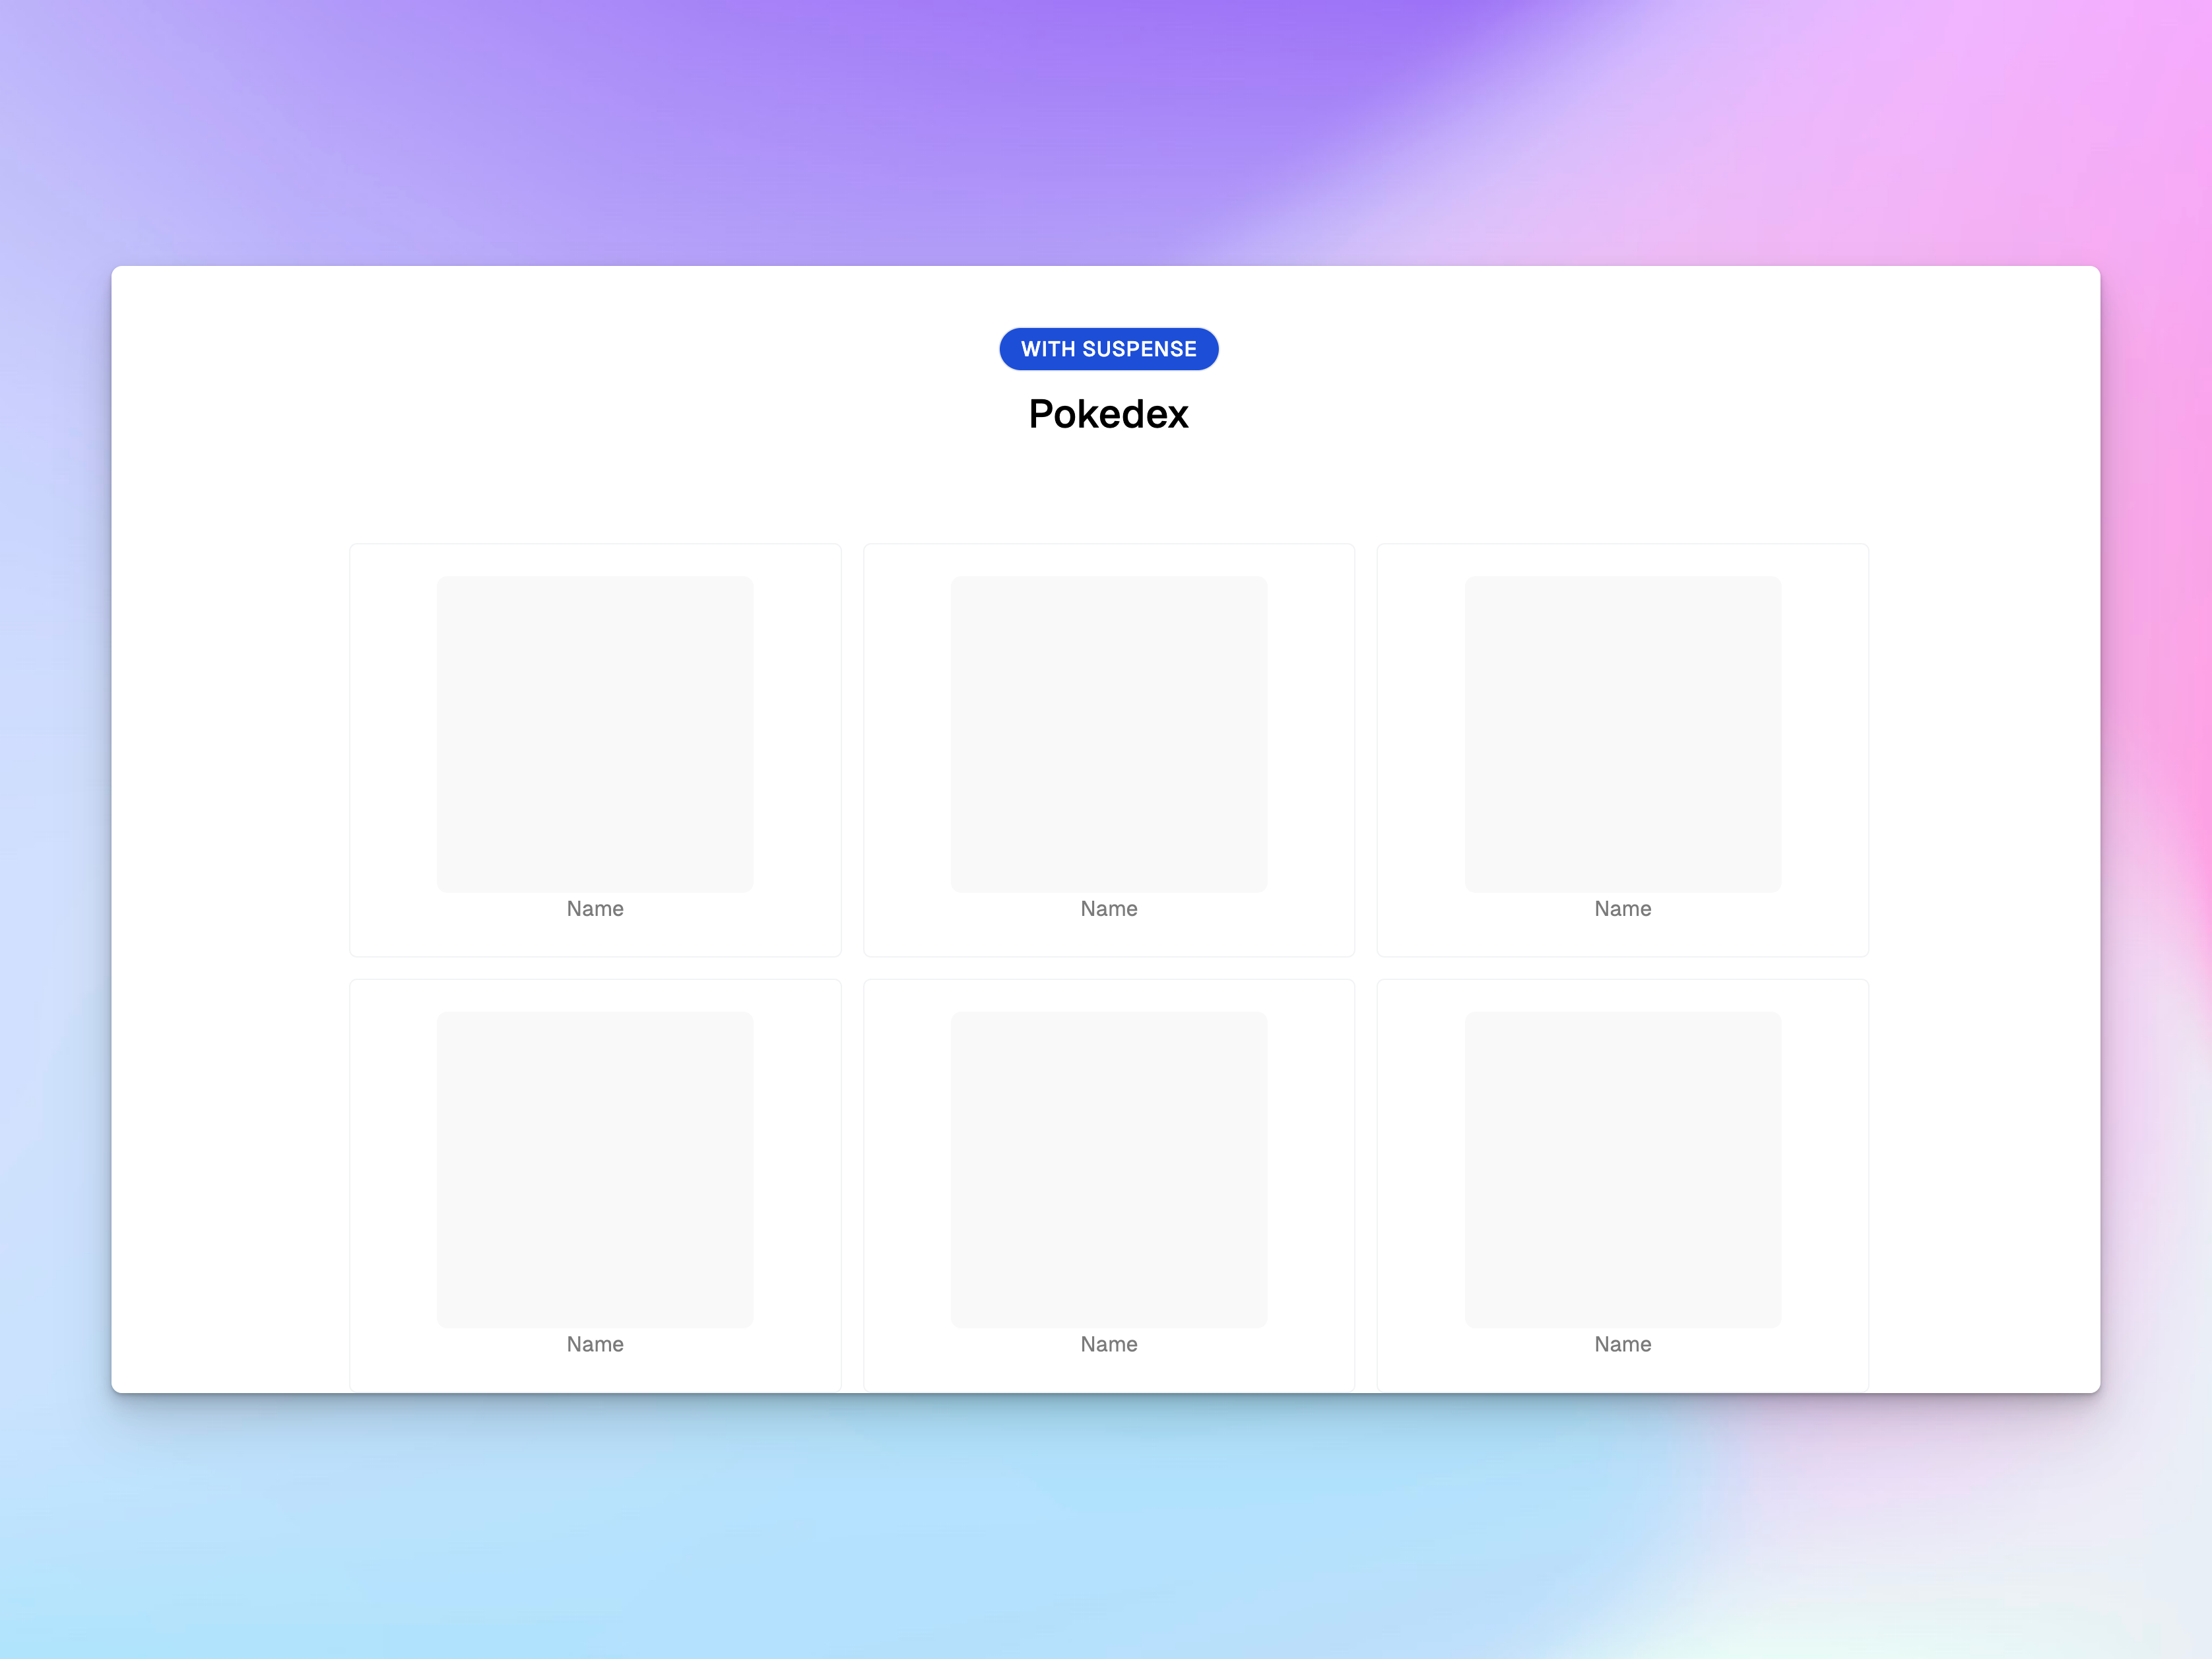
With Suspense
For this version, We created a new route called 'suspense' and added a file called loading.tsx , designed to represent the skeleton of the entire page. This will create a simple loading state.
Loading.tsx file
import { PokemonSkeleton } from "./page";

export default function Loading() {
  return (
    <div className="flex w-full  min-h-screen flex-col items-center justify-start p-24 pt-12">
      <div className="bg-blue-700 uppercase text-white p-1 font-medium tracking-wide rounded-full border px-4 mb-3.5">
        With Suspense
      </div>
      <div className="w-full mx-auto mb-20 flex justify-center">
        <h1 className="text-3xl font-medium w-fit">Pokedex</h1>
      </div>
      <div className="grid grid-cols-3 max-w-6xl gap-4 w-full mx-auto">
        {Array.from({ length: 120 }).map((_, index) => (
          <PokemonSkeleton key={index} />
        ))}
      </div>
    </div>
  );
}
In addition to loading.tsx We manually created Suspense Boundaries for your individual Pokemon Cards. The App Router supports streaming with Suspense.
A Bit about Streaming
Streaming allows you to break down the page's HTML into smaller chunks and progressively send those chunks from the server to the client.
This enables faster display of parts of the page without waiting for all data to load. Streaming aligns well with React's component model, as each component can be treated as a chunk, improving core vital stats.
PokemonList() Component with Suspense
export async function PokemonList() {
  const pokemons = await getPokemonsList();

  return (
    <div className="grid grid-cols-3 max-w-6xl gap-4 w-full mx-auto">
      {pokemons.results.map((pokemon, index) => (
        <Suspense key={index} fallback={<PokemonSkeleton />}>
          <Link
            href={`/pokemon/${pokemon.name}`}
            className="flex flex-col p-6 hover:bg-gray-50 dark:hover:bg-gray-900 items-center border border-gray-200 hover:border-gray-300 dark:border-gray-800 hover:dark:border-gray-700 rounded-md"
            key={index}
          >
            <Image
              src={`/assets/${pokemon.name}.jpg`}
              height={240}
              width={240}
              alt={pokemon.name}
            />
            <p>
              {pokemon.name.charAt(0).toUpperCase() + pokemon.name.slice(1)}
            </p>
          </Link>
        </Suspense>
      ))}
    </div>
  );
}
Custom loading UI with Suspense :
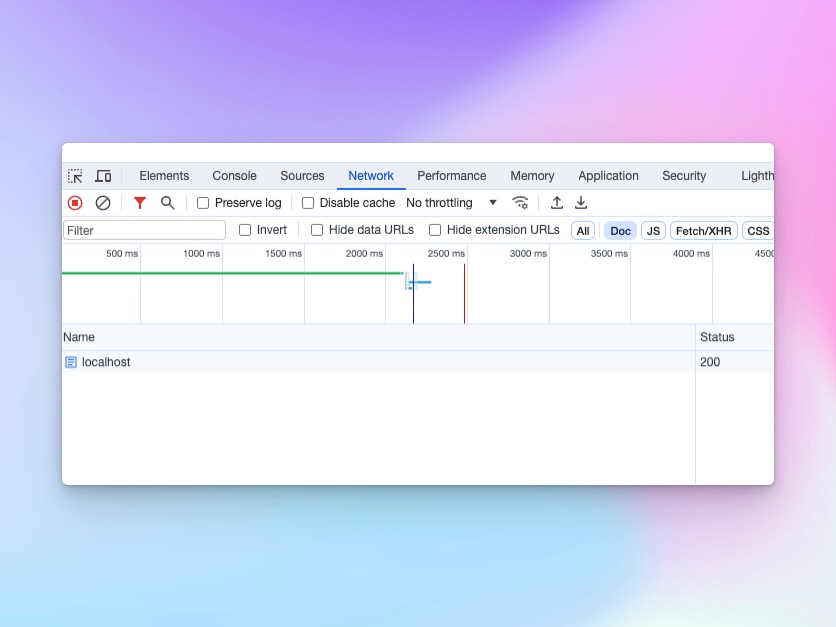
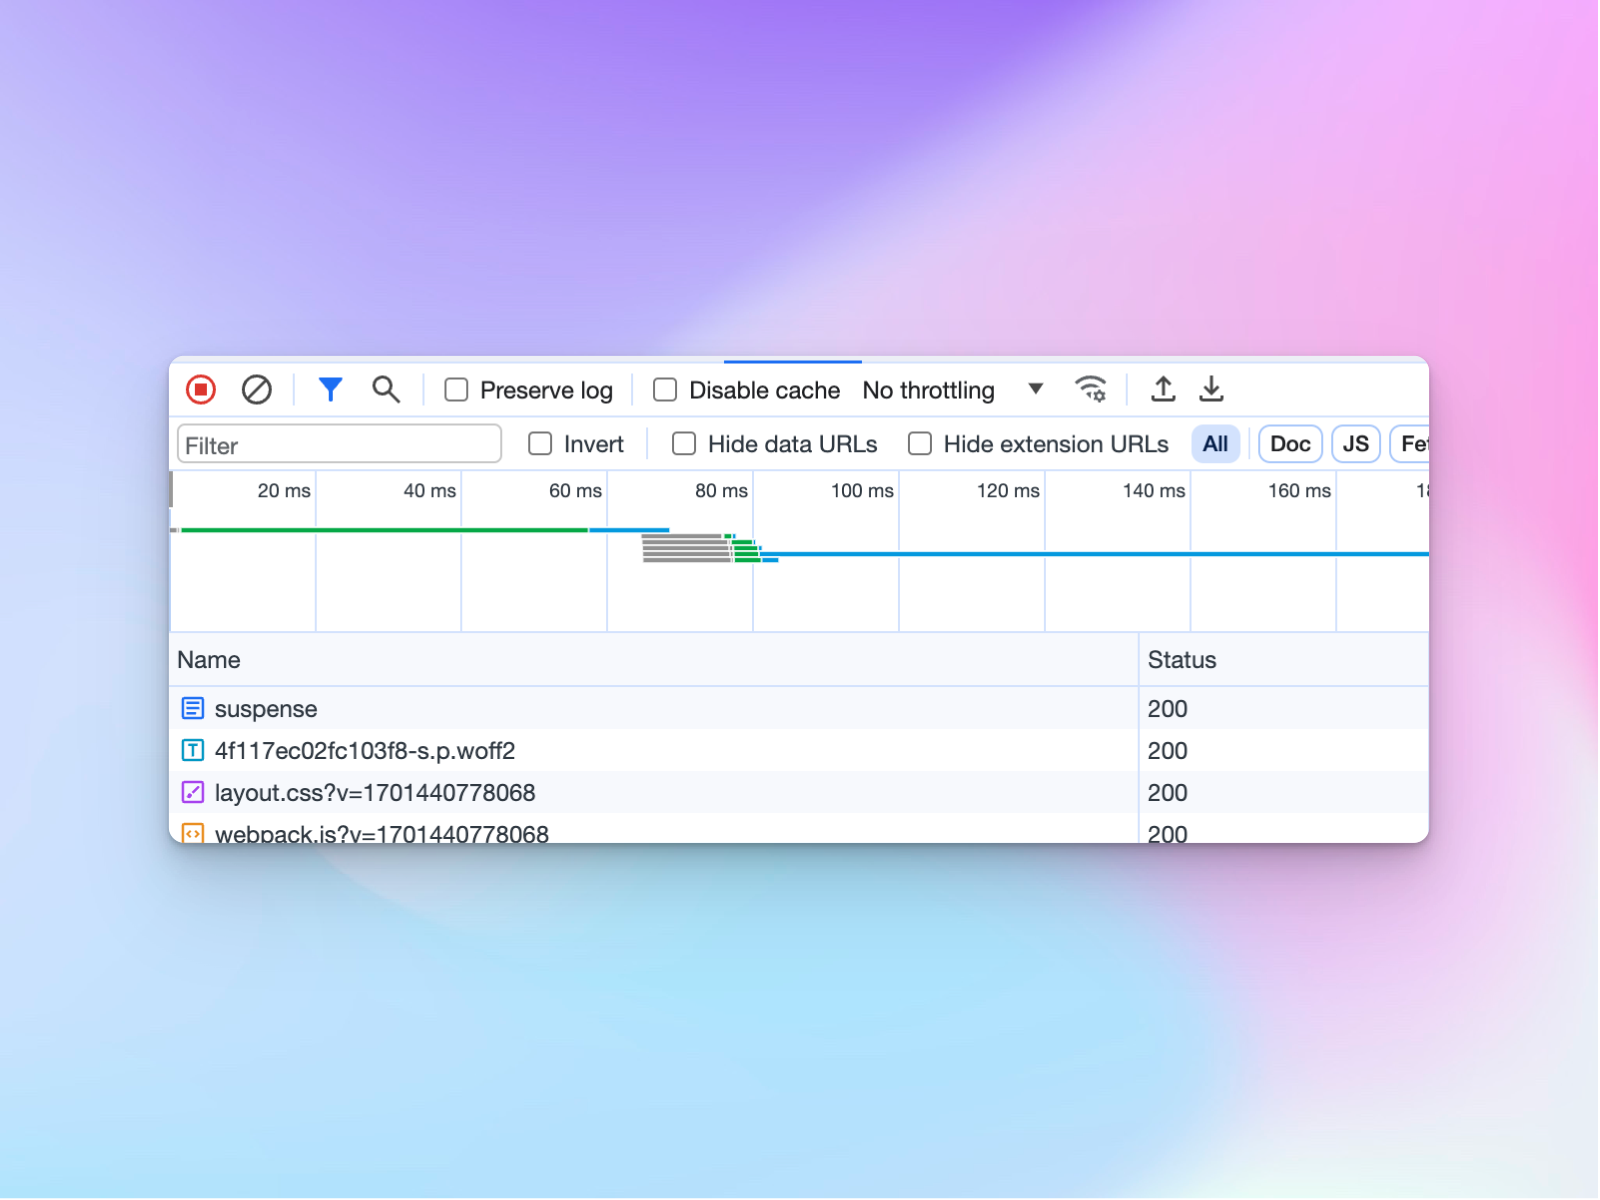
Let's now compare the page loading times for both cases.
Before using suspense :
It takes more than 2 seconds here.
After using suspense :
But here, the page load is almost instant. The fallback UI appears until the data fetching is complete.
Kudos to the Nextjs team for their hard work.
Conclusion
By incorporating Next.js Suspense with asynchronous components, you can significantly enhance the performance and responsiveness of your Next.js applications.
Happy coding!